OK, let's get started without me trying to find a nice intro.
1. You need 4 paper strips
They need to be fairly long: 30cm for 1 cm width, 50-60 cm for 2 cm width. Look for quilling of paper ball supplies. They turn out nicest when both sides are coloured, but for the tutorial I used paper with different sides.
2. Fold in half
3. Cut a point at the end for easier insertion later
4. Hold one strip in your hand, the closed side to the left, "hang" another one over it
5. Turn counter-clockwise, hang the next strip over it.
6. Now with your last strip, go over the right strip and in between the left.
7. Pull tight and flip around so the side that was previously on the bottom is on top now. The strip pointing upward should be on the right.
8. Fold the upper strip down.
9. Fold the other strips clockwise.
10. For the last one you need to insert it in the little "pocket" formed by the first strip and pull tight.
11. Now start with the left hand strip on the top. Fold 90°. Make sure you fold in the right direction.
12. Fold downward, but make sure to leave a little gap.
13. Fold inward to make a point.
14. Now you need to insert the strip under the loop again. This works best if you fold the point backwards a bit.
15. It should look like this now. Turn 90° counterclockwise, rinse and repeat. By turning ityou can always work in the same pattern.
16. Once you folded all 4 sides, flip over again and repeat on this side.
17. When you're done it should look like this.
18. Take the lower strip thats pointing to the right and fold it to the left. This is just to get it out of the way.
19. Take the right strip pointing upward and fold down. Now fold 90° BUT don't make a sharp edge, just pinch it at the centre.
20. Now make a loop and insert the strip under the strip you folded out of the way. You can see which side needs to face upward by the pattern
21. Pull tight, but not too tight so a point forms.
22. Turn clockwise, rinse and repeat. You can see that the strip actually leaves through the point.
23. Once you're done with one side, flip around. You can also leave it like this and stick on a parcel or card. If you go on you need to work in your hand.
24. Done! Almost. Cut away the remaining paper. Traditionally you cut close to the point, but I think it's nicer when working with 2 colours to leave a small margin.
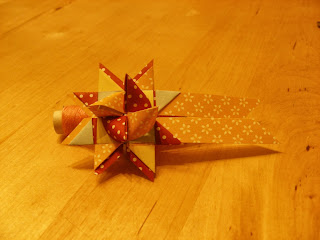
25. You can also make a shooting star. If you've made it flat you can use it as a name tag or place card and write the name on the longer strips.
26. And if you go over the top like me you can make a nice decoration.


 .
.


Keine Kommentare:
Kommentar veröffentlichen